
If you’re getting a new computer and want to give away or sell your previous one, you should first erase your hard drive. This is a necessary step as it ensures your files won’t be seen by anyone and removes all traces of your data.
Your old hard drive can include a lot of sensitive information, such as private photos, medical records, browser history, financial details, or emails. In most cases, simply “deleting” these files won’t be enough as they can be recovered. However, wiping a hard drive makes it a lot more difficult for any data to be recovered (although it can still be possible if done by experts).
This guide shows you how you can wipe your hard drive on Windows 11.
Note: Wiping your hard drive means deleting all the files, programs, and other data. Before you start, make sure to back up any important files you don’t want to lose.
Using File Explorer
This method is the simplest way to erase your hard drive. This method only works on secondary drives, meaning you can’t erase the drive you have Windows installed on.
- Go to the Start menu and type in “file explorer”, then click the first result.

Type in file explorer in the search menu. - Find the hard drive you want to erase in the File Explorer window. Right-click it and select Format.

Right-click the drive and select Format. - In the pop-up window, uncheck the Quick Format option and click Start. The quick format option will only erase the files on your hard drive and will not overwrite the data. This means that if someone were to recover the data from your hard drive, they would be able to see everything that was on it. When you uncheck the Quick Format box, Windows will overwrite the data on your hard drive with random bits of data. This makes it much more difficult to recover the data from your hard drive.

Uncheck the Quick Format option and click Start. - A warning message will appear. If you are sure you want to format the drive, select OK.

Click OK in the warning message.
Using Disk Management
The disk management utility is another easy way to erase your hard drive. This method only works on secondary drives, meaning you can’t erase the drive you have Windows installed on.
- Go to the Start menu, type in “disk management”, and click Create and format hard disk partitions.

Select Create and format hard disk partitions. - In Disk Management, find the hard drive you want to erase. Right-click it and select Format.

Right-click the drive and select Format. - In the pop-up window, uncheck the Perform a quick format option and click OK.

Uncheck the Perform a quick format option and click OK.
Using Command Prompt
The Command Prompt is a text-based interface in Windows that allows you to execute commands. You can use it to delete almost any partition, except for the system partition.
- Press the Windows key + R on your keyboard to open the Run dialog box.
- In the Run dialog box, type in “cmd” and press Enter.

Type cmd to open the Command Prompt. - In the command prompt window, type in diskpart and press Enter.
diskpart
Type in diskpart. - Then, type in list disk and press Enter. This will show you a list of all the disks connected to your computer.
list disk
Type in list disk. - Type in select disk and then the number of the disk you want to erase. For example, if you’re going to erase the second hard drive connected to your computer, you would type in select disk 1 and press Enter.
select disk 1
Type in select disk and then the number of the disk you want to erase. - Type in clean and press Enter. This will erase all the data on your hard drive.
clean
Type in clean.
Using PowerShell
- Go to the Start menu, type in powershell, and then run it as an administrator.

Run the Windows PowerShell as an administrator. - In PowerShell, type in the following command and press Enter:
get-volume
Type in get-volume. - Type in the following command, replacing “X” with the drive letter of your hard drive, and press Enter:
select XFor example, if you want to wipe your D: drive, you would type in the following command:
select D

- Next, type in the following command and press Enter:
format-volume -filesystem NTFS -newfilesystemlabel NewNameReplace “NewName” with the name you want to give your hard drive. For example, you could name it “My Erased Hard Drive.”

Type in this command format-volume -filesystem NTFS -newfilesystemlabel NewName. - Voila! You’ve just erased your hard drive.
Using the Reset Option
Windows 11 has a reset option that allows you to quickly and easily erase your entire Windows operating system drive.
- Go to the Start menu and click Settings.

Select Settings. - In the left-hand column, click System, then scroll down and click Recovery.

Select System > Recovery. - Under the Recovery options section, click Reset PC.

Click Reset PC. - The Reset this PC window will pop up, giving you two options: Keep my files and Remove everything. Choose Remove everything to wipe your hard drive.

Click Remove everything. - In the next window, two options will appear, Cloud download, which will allow you to reinstall Windows from scratch, and Local reinstall, which will use a backup file on your computer to reinstall Windows. We recommend choosing Cloud download, giving you a fresh copy of Windows. Just make sure that you are connected to the internet before selecting this option.

Click Cloud download. - In the next window, click Change settings.

Click Change settings. - Under the Clean data? section, switch the toggle to Yes, then click Confirm. This step will ensure that all your data is erased from your hard drive.

Toggle the Clean data switch to Yes, then select Confirm. - In the Additional settings window, click Next.

Click Next. - A confirmation window will appear. Click Reset.

Click Reset. - Your computer will now restart and begin erasing your Windows hard drive and reinstalling Windows.
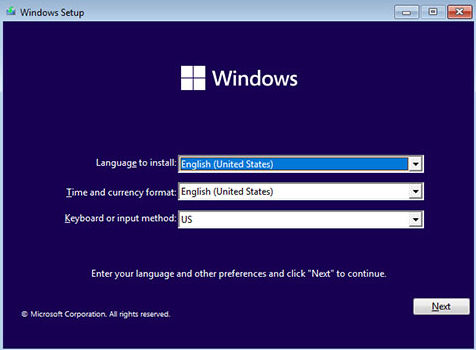
Using Windows Setup
The final method in our list is using the Windows setup process to erase your hard drive. You can use this method if you install Windows from scratch on your computer. It will not work if you’re trying to reinstall Windows on top of an existing installation or upgrade to a new version.
If you don’t know how to install Windows 11 on your system, please read this post: How to Install Windows 11 from a USB.
- Select the language you want to install on the Windows installation screen and click Next.
The Windows installation screen. - Click Install now.

Click Install now. - Enter your product key, then click Next. If you don’t have a product key, you can click the I don’t have a product key option.

Click I don’t have a product key. - Choose a windows version, then click Next.

Choose a windows version. - Agree to the terms and conditions, then click Next.

Accept the terms, then click Next. - In the Which type of installation do you want section, choose Custom: Install Windows only (advanced).

Choose Custom: Install Windows only (advanced). - Select the partition you want to erase, click the Format button, then click Next.

Select the partition and click the Format button. - Continue through the installation process until you reach the final window. Once you’re there, your hard drive will be erased and Windows installed.
Using a third-party application
Third-party tools can be an effective way to clear your hard drive. There are many free and paid apps available.
DBAN
DBAN is one of the most popular data destruction programs available to erase data on your hard drive securely. It’s a free and open-source application. You can use DBAN to wipe entire hard drives or just selected partitions.
Note: DBAN is a bootable program, which means you’ll need to create a bootable DBAN USB drive or CD before you can use it.
- Download DBAN from the DBAN official website.

Click Download. - Burn DBAN to a disc or USB device. You can do so by using Rufus, a free burning tool. Download it from the Rufus official website.

Download Rufus. - Plug in the CD or USB drive, then open up Rufus.
- Choose your USB drive from the “Device” drop-down menu.

Select your device. - Click SELECT and choose the DBAN ISO file you downloaded.

Click SELECT and choose the ISO file. - Click the START button to write the ISO file on your USB drive. This step will erase everything on your USB drive, so ensure you’ve backed up any important files.

Click START. - Once it’s done, restart your computer and boot from the DBAN disc or USB drive.
- There’s a list of choices on the main menu of the DBAN program. Press ENTER to launch DBAN in the interactive mode to have more control over the wipe methods.

Click ENTER. - A list of connected drives will appear. Use the arrow keys on your keyboard to move the selector up and down to select drives, and you can use the spacebar to toggle each drive to be wiped. When the drive is marked to be wiped, the word “wipe” will appear in the little box to the left of the drive.

Use the spacebar to toggle each drive to be wiped. - Press M to choose the method DBAN will use to erase your drive. Each of these different methods overwrites the data a different number of times, with the ones that overwrite data more times being considered more secure.

Choose the method DBAN will use to erase your drive. - When you choose a method, press ENTER to select it.
- F10 is the key to begin wiping the drive. Once you press it, there’s no going back, so make sure you want to press it before you do. When you’re sure, press F10, and the erasure will begin.