Margins mark the edges of text in a word document. By default, every Word document has a margin at the top, bottom, left, and right. In this article, we’ll discuss four different ways to adjust margins using the Microsoft Office 365 version of Word.
Using Preset Margins
This is the easiest way to change margins in MS Word. To access the preset margins:
- Click the Layout tab from the top menu bar.

Click the Layout tab. - Click Margins in the “Page Setup” group.

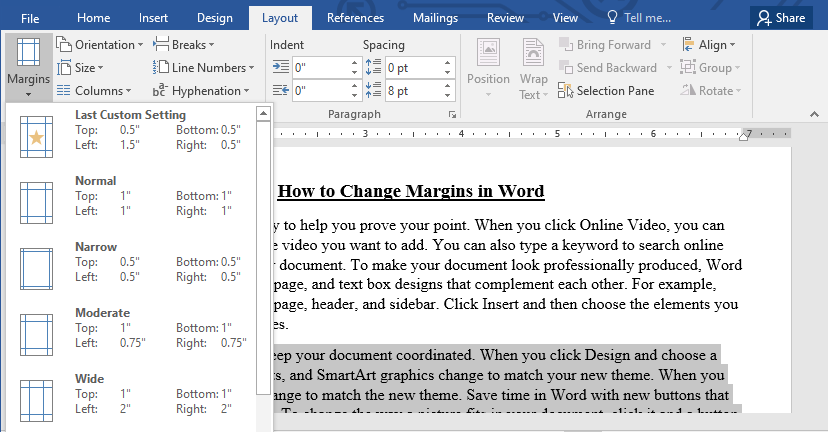
Click the Margins button. - Select one of the preset margin options from the drop-down menu.

Select one of the preset margin options. That’s it! The changes will be applied to the margins of your current document.
Adjust Page Margins Using the Ruler Tool
To use this method, you need to ensure that you’ve enabled Print view and the ruler tool. To enable Print view:
- Navigate to the View tab.
- Select Print Layout from the Views group.

View >Print Layout
To make sure the Ruler is displayed:
- Click the View tab
- Check the box next to Ruler.

View > Ruler
To adjust the Left margin:
- Place the cursor at the horizontal ruler between the color split. A horizontal double-headed arrow appears.

Place the cursor at the horizontal ruler between the color split. - Drag the arrow left or right to make the margins narrower or wider.
- Repeat the steps to adjust the margin on the right.
To adjust the Top margin:
- Place the cursor at the vertical ruler on the left between the color split. A vertical double-headed arrow appears.

Place the cursor at the vertical ruler between the color split. - Drag the arrow up or down to adjust the width of the Top margin.
- Repeat the steps to adjust the bottom margin.
Creating Custom Margins in Word
If the preset Margin options do not offer enough functionality, you can create custom margins to fit your needs.
- Click the Layout tab, then select Margins.

Click the Layout tab, then select Margins. - At the bottom of the drop-down menu, select Custom Margins.

Select Custom Margins - Enter the desired size for the Top, Bottom, Left, and Right margins.

Enter the desired margin size. - Click OK to apply the changes to your current document.

Click OK - If you want to use the custom margin settings that you have created as the default, select Set As Default, then click OK.

Select Set As Default
The Custom Margin setting will be used for each new word document you create.
Changing Margins for a Section of Your Document in Word
By default, the preset margin options will apply the changes to the entire document. If you need to change margins for only a section of your document:
- Highlight the section of the document where you want a different margin size.

Highlight the desired text. - Click the Layout tab, then select Margins.
Click the Layout tab then select Margins. - Select Custom Margins at the bottom of the drop-down menu.
Select Custom Margins from the drop-down menu. - Enter the desired size for the Top, Bottom, Left, and Right margins.
Enter the desired margin size - In the Apply to dropdown, choose Selected text.

Choose Selected text. - Click OK to apply the changes to the selected section of the document.