
Taking in-game screenshots on PS5 is relatively easy. However, getting them onto your smartphone is a little more tricky. Thankfully, Sony is rolling out a new feature that automatically uploads screenshots and video clips to the PlayStation App. This makes it easier to share your in-game photography and footage.
The new feature is slowly rolling out and is expected to be available in all regions soon. Players running Software Version 21.02-04.50.00 or newer will get this option of “Auto Uploading” their captures screenshots and clips.

Linking your PS5 to the PlayStation App
- First, download the PlayStation App on your phone or tablet (Android, Apple)

Linking the PS5 with the PlayStation App on phone - When you have the app downloaded, link it to your console by going to the Settings > Console Management > Link Console to App.

Linking the Console to the PlayStation App - Next, you have to connect your PlayStation 5 to the app. On your PS5, go to Settings > System > Power Saving > Enter Rest Mode. You will then reach the Features Available in Rest Mode screen.

The Rest Mode is available in the power menu. - Make sure you have the “Stay Connected to the Internet” setting enabled

Features available in rest mode on PS5 - Make sure the console remains in Rest Mode


Use the Captures feature
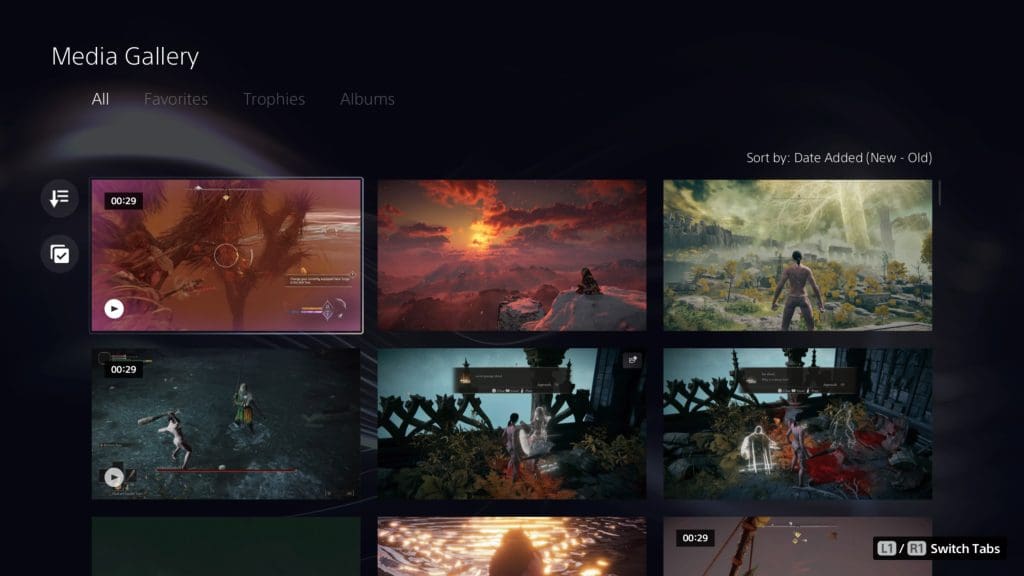
- On the PS5, navigate to the library and locate the Media Gallery app

Media Gallery App can be found in the library - A pop-up informing you of the new Captures feature will appear when you launch the app. Accept it.
- Make sure you have PlayStation App linked to your console on your phone.
- Login using the same PSN ID credentials you use on the PlayStation 5
- Tap the Game Library icon once you are logged in

Captures featured enabled on the PlayStation App - From there, click on the Captures section
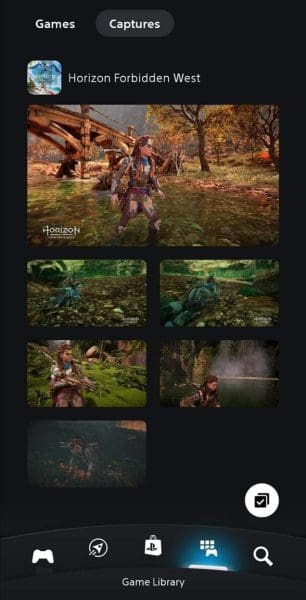
Screenshots being shown in the PlayStation app Captures gallery - Your screenshots will appear here. You can easily download and share them

Easily saving screenshots to the phone using PS App


Important points about the Captures feature
- The Captures feature on the PlayStation App only saves screenshots and clips for 14 days. After that, the clips are automatically deleted from the cloud server but remain on your console.
- 4K footage isn’t supported as the video resolution is capped at 1920×1080.
- Only video clips under 3 minutes can be shared.
- You can use the Captures feature even without Wi-Fi
- You don’t need an active PlayStation Plus subscription to use the Captures feature
- You can’t manually upload screenshots and clips to the app
- Deleting photos and clips on the console won’t delete them from the Captures feature
Send Screenshots to a Friend
- Go to the Media Gallery app on your PS5.
- Select the screenshots and clips you want to share using the selection tool

Selecting multiple screenshots to be shared - Now click on share
- Send the photos/clips to either a friend or a secondary account you’ve made.

Sending screenshots to PlayStation friends - Get on the PlayStation App on the phone.
- Go to Chats and locate the conversation you sent the photos to

Checking out screenshots shared in a private chat - Open the chat and click on the screenshot/clip

Downloading a screenshot to the phone using PS App - Now download them to your phone.


Note: This method can only send four screenshots or clips at a time.
- Link your Twitter account to your PS5 by going to Settings > Users and Accounts > Link with other Services

Linking a Twitter account on the PS5 - From the Media Gallery app, share the photos and clips you want to Twitter. Note: you can set your Twitter to private if you don’t want the images public.

Sharing screenshot on Twitter from the Media Gallery App 
Sharing a Screenshot to Twitter on PS5 - On your phone or tablet, launch Twitter and navigate to your profile.

Recently shared screenshot on Twitter - You can Save the screenshot from your Tweet

Saving screenshot from Twitter using the App


Use a USB Drive
- Attach a USB drive to your PlayStation 5
- Go to the Media Gallery
- Select photos and clips you want on your phone
Browsing the screenshots and clips to share - Press the Options button on the controller

The Options menu can be accessed using the Options button - Then select the Copy to USB Drive option

Copying selected screenshots to the USB drive - Wait for the files to copy and take out the USB Drive
- Plug the USB drive into your PC. If you have smart sync enabled between your PC and phone, you can easily transfer the files to your smartphone.


This method is excellent if you want to share 4K gameplay footage or have full-resolution screenshots.